
新钛云服已累计为您分享671篇技术干货 操作系统环境:CentOS 7.9 x64 4c8g。配置主机名解析。 [root@node01 ~]$ cat /etc/hosts
127.0.0.1 localhost localhost.localdomain localhost4 localhost4.localdomain4
::1 localhost localhost.localdomain localhost6 localhost6.localdomain6 192.168.56.111 node01.tyun.cn node01
先决条件
在安装 Oracle 19c 前,需要安装其依赖软件,并修改相应的内核参数。操作如下: [1] 安装桌面环境(非必须,如果字符界面搞不定,可以使用此步骤) [2] 安装数据库必须的依赖软件包 [root@node01 ~] # yum -y install binutils \
compat-libcap1 gcc gcc-c++ \
glibc glibc.i686 glibc-devel glibc.i686 \
ksh libaio libaio.i686 libaio-devel libaio-devel.i686 \
libgcc libgcc.i686 libstdc++ \
libstdc++.i686 libstdc++-devel \
libstdc++-devel.i686 compat-libstdc++-33 \
compat-libstdc++-33.i686 libXi libXi.i686 \
libXtst libXtst.i686 make sysstat
[3] 编辑内核参数 [root@node01 ~] # MEMTOTAL=$(free -b | sed -n '2p' | awk '{print $2}')
[root@node01 ~] # echo $MEMTOTAL
8201162752
[root@node01 ~] # SHMMAX=$(expr $MEMTOTAL / 2)
[root@node01 ~] # SHMMNI=4096
[root@node01 ~] # PAGESIZE=$(getconf PAGE_SIZE)
[root@node01 ~] # echo $SHMMAX
4100581376
[root@node01 ~] # echo $PAGESIZE
4096 [root@node01 ~] # cat > /etc/sysctl.d/50-oracle.conf << EOF
fs.aio-max-nr = 1048576
fs.file-max = 6815744
kernel.shmmax = $SHMMAX
kernel.shmall = $(expr \( $SHMMAX / $PAGESIZE \) \* \( $SHMMNI / 16 \))
kernel.shmmni = $SHMMNI
kernel.sem = 250 32000 100 128
net.ipv4.ip_local_port_range = 9000 65500
net.core.rmem_default = 262144
net.core.rmem_max = 4194304
net.core.wmem_default = 262144
net.core.wmem_max = 1048576
EOF [root@node01 ~] # sysctl --system
.....
.....
* Applying /etc/sysctl.d/50-oracle.conf ...
fs.aio-max-nr = 1048576
fs.file-max = 6815744
kernel.shmmax = 9469661184
kernel.shmall = 591853824
kernel.shmmni = 4096
kernel.sem = 250 32000 100 128
net.ipv4.ip_local_port_range = 9000 65500
net.core.rmem_default = 262144
net.core.rmem_max = 4194304
net.core.wmem_default = 262144
net.core.wmem_max = 1048576
* Applying /usr/lib/sysctl.d/60-libvirtd.conf ...
fs.aio-max-nr = 1048576
* Applying /etc/sysctl.d/99-sysctl.conf ...
* Applying /etc/sysctl.conf ...
[4] 为 Oracle 数据库创建用户及其组 [root@node01 ~] # i=54321; for group in oinstall dba oper backupdba dgdba kmdba asmdba asmoper asmadmin racdba; do
groupadd -g $i $group; i=$(expr $i + 1)
done [root@node01 ~] # useradd -u 54321 -g oinstall -G dba,oper,backupdba,dgdba,kmdba,asmdba,racdba -d /usr/oracle oracle
[root@node01 ~] # passwd oracle
Changing password for user oracle.
New password: # oraclePassword
Retype new password: # oraclePassword
passwd: all authentication tokens updated successfully. [root@node01 ~] # mkdir -p /u01/app/oracle
[root@node01 ~] # chown -R oracle:oinstall /u01/app
[root@node01 ~] # chmod -R 755 /u01 [root@node01 ~] # vi /etc/pam.d/login # line 15: add
session required pam_selinux.so open
session required pam_namespace.so
session required pam_limits.so # 增加此行
session optional pam_keyinit.so force revoke
session include system-auth
-session optional pam_ck_connector.so [root@node01 ~] # vi /etc/security/limits.d/50-oracle.conf # create new
oracle soft nofile 1024
oracle hard nofile 65536
oracle soft nproc 2047
oracle hard nproc 16384
oracle soft stack 10240
oracle hard stack 32768
[5] 登录 oracle 用户,并创建环境变量 node01 login: oracle
Password: [oracle@node01 ~]$ vi ~/.bash_profile
# add to the end
umask 022
export ORACLE_BASE=/u01/app/oracle
开始安装
在所有的准备工作准备完成后,就可以正式进行安装了。 图形界面安装 省略。我们的主要目的就是在字符界面下完成数据库的安装。 字符界面安装 [1] 登录 oracle 用户,并准备需要的环境变量 # create a directory for installation
[oracle@node01 ~]$ mkdir database [oracle@node01 ~]$ vi ~/.bash_profile # add to the end
# ORACLE_BASE : base directory for application
# ORACLE_HOME : Oracle home
umask 022
export ORACLE_BASE=/u01/app/oracle
export ORACLE_HOME=/usr/oracle/database
export PATH= $PATH: $ORACLE_HOME/bin [oracle@node01 ~]$ source ~/.bash_profile
[2] 针对 Gnu/Linux 发行版,选择合适的数据库版本,我们这里选择 19c ⇒ https://www.oracle.com/database/technologies/oracle-database-software-downloads.html [3] 上传已经下载好的 Oracle 文件,解压并开始安装数据库软件 如果我们要在桌面环境下安装,可以运行./runInstaller,不带参数即可。 [oracle@node01 ~]$ cd database
[oracle@node01 database]$ unzip LINUX.X64_193000_db_home.zip [oracle@node01 database]$ export ORA_INVENTORY=/u01/app/oraInventory # for example, install Enterprise Edition with software only (not create DB yet)
[oracle@node01 database]$ ./runInstaller -ignorePrereq -waitforcompletion -silent \
oracle.install.option=INSTALL_DB_SWONLY \
ORACLE_HOME= $ORACLE_HOME \
ORACLE_BASE= $ORACLE_BASE \
UNIX_GROUP_NAME=oinstall \
INVENTORY_LOCATION= $ORA_INVENTORY \
oracle.install.db.InstallEdition=EE \
oracle.install.db.OSDBA_GROUP=dba \
oracle.install.db.OSOPER_GROUP=oper \
oracle.install.db.OSBACKUPDBA_GROUP=backupdba \
oracle.install.db.OSDGDBA_GROUP=dgdba \
oracle.install.db.OSKMDBA_GROUP=kmdba \
oracle.install.db.OSRACDBA_GROUP=racdba \
oracle.install.db.rootconfig.executeRootScript= true \
oracle.install.db.rootconfig.configMethod=ROOT \
oracle.install.db.config.starterdb.type=GENERAL_PURPOSE \
oracle.install.db.ConfigureAsContainerDB= false Launching Oracle Database Setup Wizard... [WARNING] [INS-35950] Installer has detected an invalid entry in the central inventory corresponding to Oracle home (/usr/oracle/database).
ACTION: Choose a different location as Oracle home. # 需要输入 root 密码
Enter password for 'root' user:
[WARNING] [INS-13014] Target environment does not meet some optional requirements.
CAUSE: Some of the optional prerequisites are not met. See logs for details. /u01/app/oraInventory/logs/InstallActions2022-04-24_05-12-06PM/installActions2022-04-24_05-12-06PM.log
ACTION: Identify the list of failed prerequisite checks from the log: /u01/app/oraInventory/logs/InstallActions2022-04-24_05-12-06PM/installActions2022-04-24_05-12-06PM.log. Then either from the log file or from installation manual find the appropriate configuration to meet the prerequisites and fix it manually.
The response file for this session can be found at:
/usr/oracle/database/install/response/db_2022-04-24_05-12-06PM.rsp You can find the log of this install session at:
/u01/app/oraInventory/logs/InstallActions2022-04-24_05-12-06PM/installActions2022-04-24_05-12-06PM.log
Successfully Setup Software with warning(s).
创建 Oracle 监听
我们通过两种形式创建 Oracle 监听。 图形界面设置 Listener 省略。我们的主要目的就是在字符界面下完成所有的操作。 字符界面设置 Listener [1] 登录 oracle 用户,通过netca命令增加网络监听 # create a response file
# all parameters below are default values, change them for your needs
[oracle@node01 ~]$ vi netca.rsp [GENERAL]
RESPONSEFILE_VERSION= "19.0"
CREATE_TYPE= "CUSTOM" [oracle.net.ca]
INSTALLED_COMPONENTS={ "server", "net8", "javavm"}
INSTALL_TYPE= ""typical ""
LISTENER_NUMBER=1
LISTENER_NAMES={ "LISTENER"}
LISTENER_PROTOCOLS={ "TCP;1521"}
LISTENER_START= ""LISTENER ""
NAMING_METHODS={ "TNSNAMES", "ONAMES", "HOSTNAME"}
NSN_NUMBER=1
NSN_NAMES={ "EXTPROC_CONNECTION_DATA"}
NSN_SERVICE={ "PLSExtProc"}
NSN_PROTOCOLS={ "TCP;HOSTNAME;1521"} [oracle@node01 ~]$ netca -silent -responsefile $( pwd)/netca.rsp
Parsing command line arguments:
Parameter "silent" = true
Parameter "responsefile" = /usr/oracle/netca.rsp
Done parsing command line arguments.
Oracle Net Services Configuration:
Profile configuration complete.
Oracle Net Listener Startup:
Running Listener Control:
/usr/oracle/database/bin/lsnrctl start LISTENER
Listener Control complete.
Listener started successfully.
Listener configuration complete.
Oracle Net Services configuration successful. The exit code is 0
[2] 创建监听后,可以使用tnslsnr命令查看监听状态。如下: [oracle@node01 ~]$ ss -napt | grep 1521
LISTEN 0 128 *:1521 *:* users:(( "tnslsnr",pid=25768,fd=8))
TIME-WAIT 0 0 127.0.0.1:1521 127.0.0.1:46686
TIME-WAIT 0 0 127.0.0.1:46672 127.0.0.1:1521 ## 可选步骤 ##
# 修改监听地址为:0.0.0.0
[oracle@node01 ~]$ cat $ORACLE_HOME/network/admin/listener.ora
# listener.ora Network Configuration File: /usr/oracle/database/network/admin/listener.ora
# Generated by Oracle configuration tools. LISTENER =
(DESCRIPTION_LIST =
(DESCRIPTION =
(ADDRESS = (PROTOCOL = TCP)(HOST = 0.0.0.0)(PORT = 1521))
(ADDRESS = (PROTOCOL = IPC)(KEY = EXTPROC1521))
)
) # 重启监听
[oracle@node01 ~]$ lsnrctl stop ; lsnrctl start LSNRCTL for Linux: Version 19.0.0.0.0 - Production on 24-APR-2022 17:37:05 Copyright (c) 1991, 2019, Oracle. All rights reserved. Connecting to (DESCRIPTION=(ADDRESS=(PROTOCOL=TCP)(HOST=0.0.0.0)(PORT=1521)))
TNS-12541: TNS:no listener
TNS-12560: TNS:protocol adapter error
TNS-00511: No listener
Linux Error: 111: Connection refused
Connecting to (DESCRIPTION=(ADDRESS=(PROTOCOL=IPC)(KEY=EXTPROC1521)))
The command completed successfully
## 可选步骤 ## [oracle@node01 ~]$ tnsping localhost TNS Ping Utility for Linux: Version 19.0.0.0.0 - Production on 24-APR-2022 17:39:39 Copyright (c) 1997, 2019, Oracle. All rights reserved. Used parameter files:
/usr/oracle/database/network/admin/sqlnet.ora Used EZCONNECT adapter to resolve the alias
Attempting to contact (DESCRIPTION=(CONNECT_DATA=(SERVICE_NAME=))(ADDRESS=(PROTOCOL=tcp)(HOST=127.0.0.1)(PORT=1521)))
OK (70 msec)
[3] If Firewalld is running, allow listener port. [root@node01 ~] # firewall-cmd --add-port=1521/tcp --permanent
success [root@node01 ~] # firewall-cmd --reload
success
创建 Database图形界面创建数据库
[1] 登录 oracle 用户,通过 dbca 命令打开创建数据库的向导 [oracle@node01 ~]$ dbca
[2] 选择 [Create Database] 并下一步 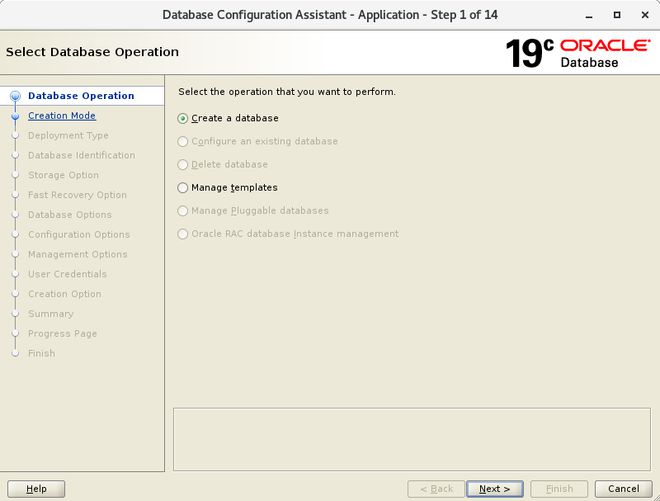
[3] 在本示例中,选择 [Advanced Mode] 并下一步 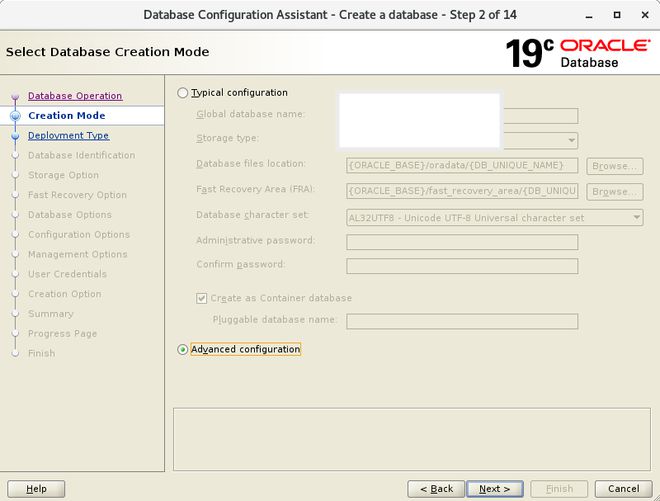
[4] 在本示例中我们选择 [General Purpose or Transaction Processing] 并下一步 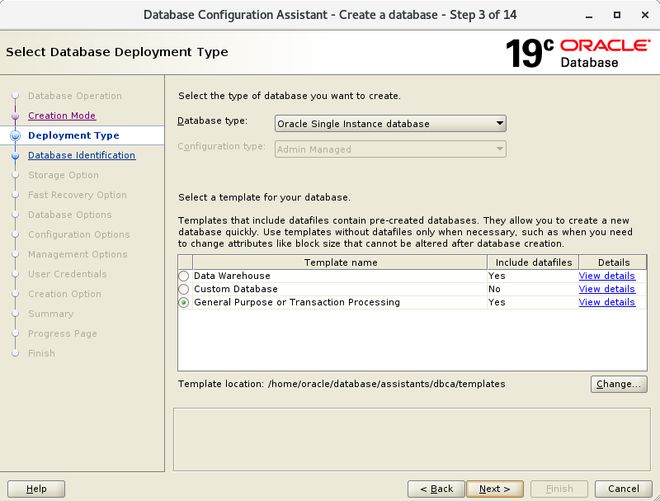
[5] 设置全局数据库名称及 SID 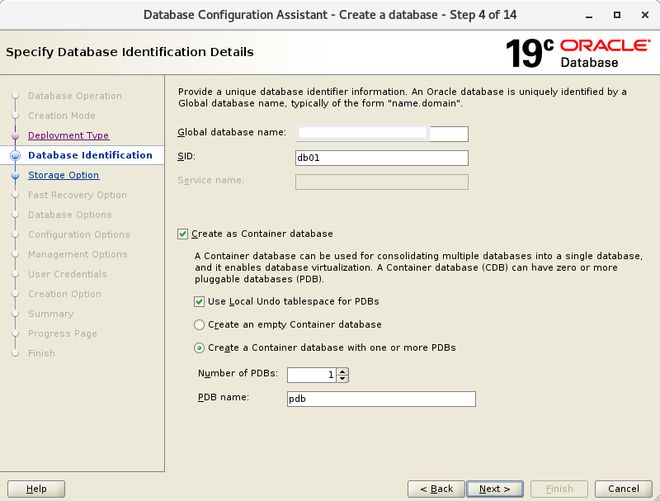
[6] 保持默认并下一步 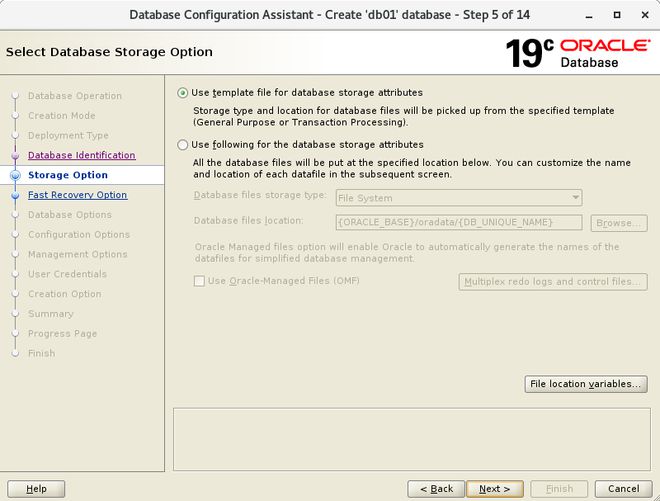
[7] 这是恢复相关的配置。如果有需要可以进行配置,我们这里保持默认 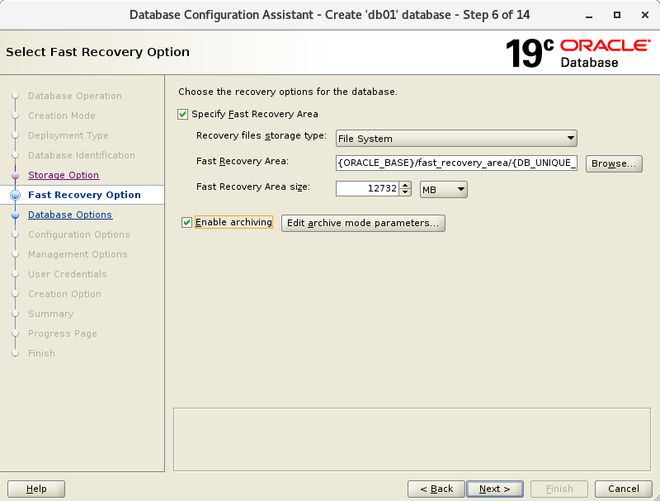
[8] 监听相关配置。指定我们刚才配置的监听信息 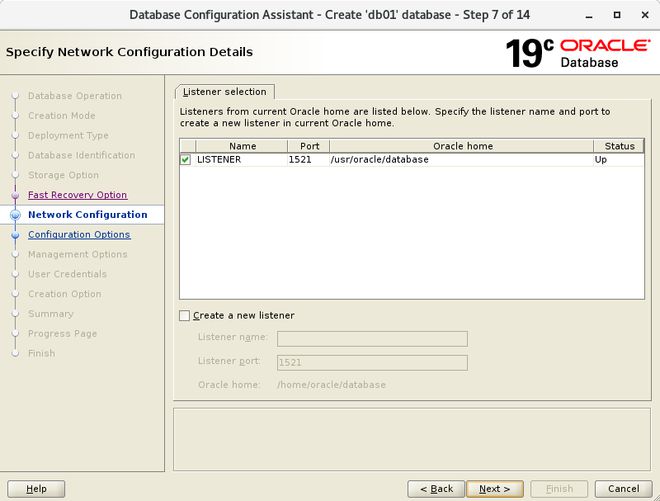
[9] 这是 Oracle Vault 相关配置。如果有需要可以进行配置,我们这里保持默认 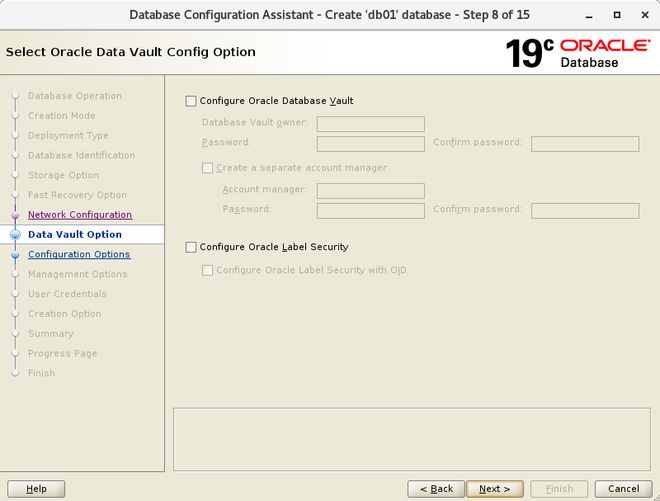
[10] 内存相关配置。配置完成后,到 Sizing 标签页,我们这里依然保持默认 
[11] 配置最大进程数。我们这里保持默认 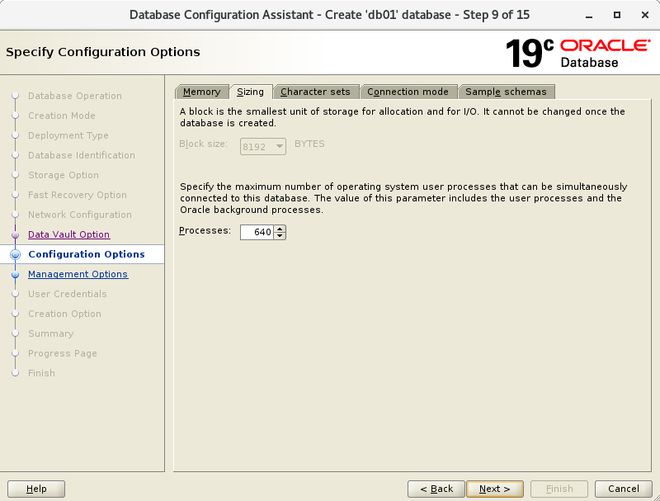
[12] 字符集配置,我们这里保持默认 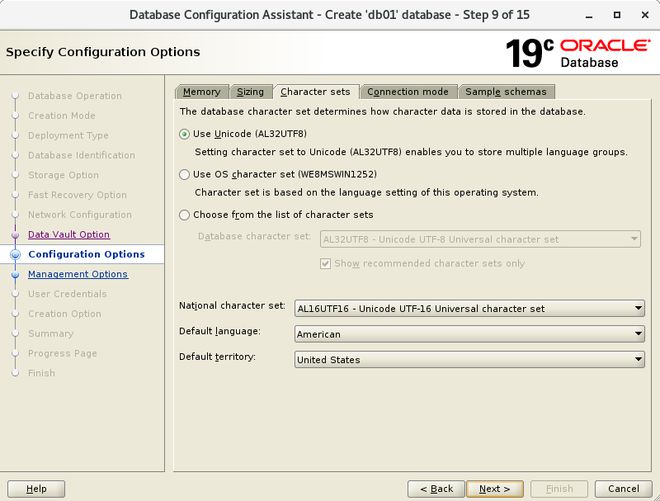
[13] 选择连接模式。如果我们的服务器没有很多客户端,请选择专用服务器模式。如果服务器有许多客户端,请选择共享服务器模式。 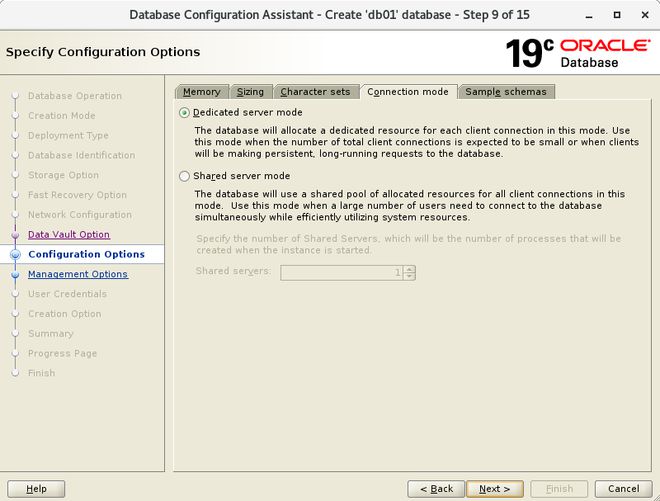
[14] 配置 Oracle Enterprise Manager 的端口,我们这里保持默认 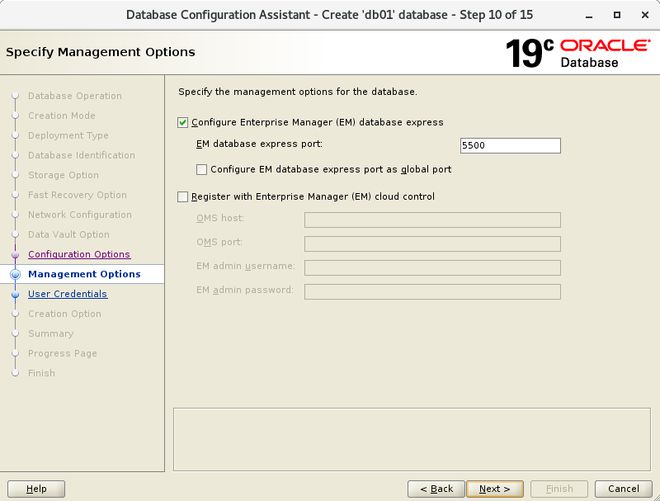
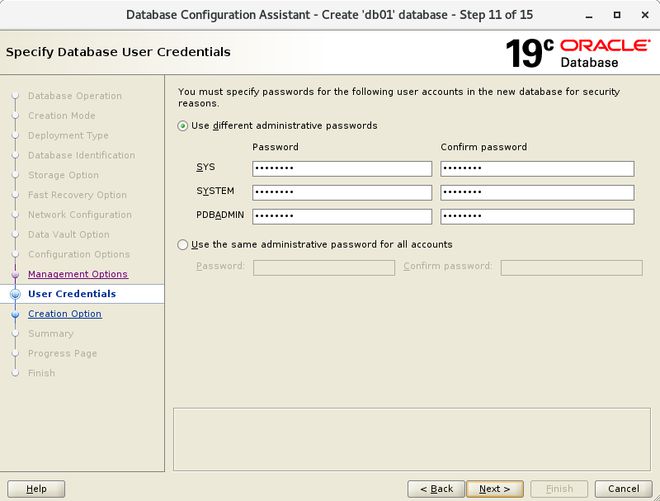
[15] 设置 Oracle 用户密码。根据公司内部的安全策略进行密码的设置
[16] 数据库的一些选项配置,我们这里保持默认 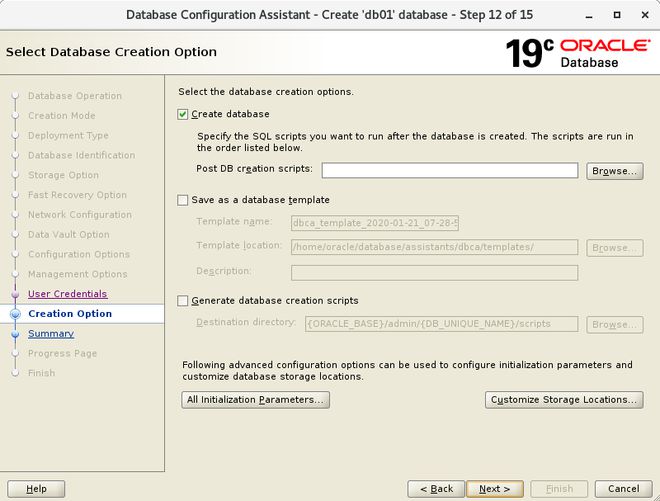
[17] 再次确认我们上述的选择,如果没有问题,就点击 [Finish] 完成选择 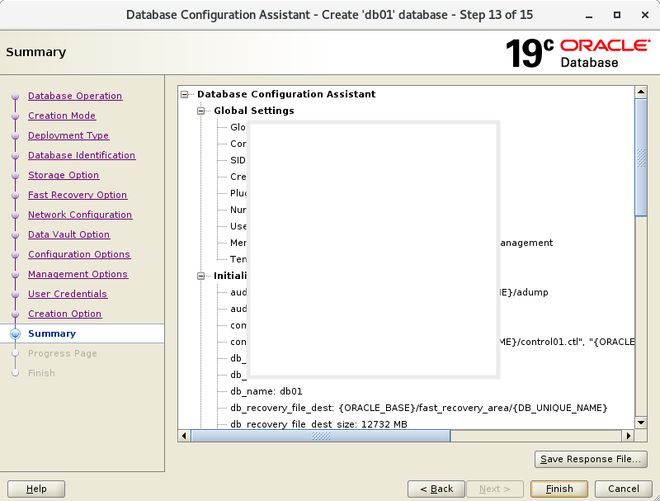
[18] 接下来创建数据库的任务就开始了 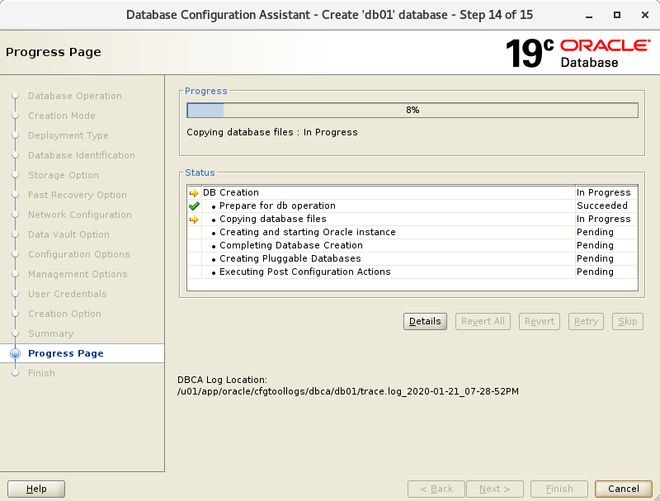
[19] 当创建完成后,可以关闭对话框 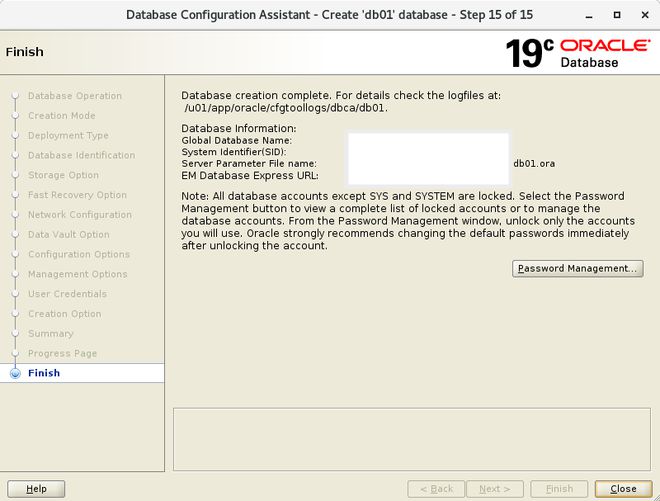
[20] 把数据库的 SID 加到环境变量,并测试连接数据库 [oracle@node01 ~]$ vi /etc/oratab # change like follows
db01:/usr/oracle/database:Y [oracle@node01 ~]$ vi ~/.bash_profile # add your SID to the end
export ORACLE_SID=db01 [oracle@node01 ~]$ source ~/.bash_profile
[oracle@node01 ~]$ sqlplus /nolog SQL*Plus: Release 19.0.0.0.0 - Production on Tue Jan 21 20:07:57 2020
Version 19.3.0.0.0 Copyright (c) 1982, 2019, Oracle. All rights reserved. SQL> connect / as sysdba
Connected.
SQL> select instance_name, host_name, version, startup_time from v $instance; INSTANCE_NAME
----------------
HOST_NAME
----------------------------------------------------------------
VERSION STARTUP_T
----------------- ---------
db01
node01.tyun.cn
19.0.0.0.0 25-APR-22 SQL> exit
Disconnected from Oracle Database 19c Enterprise Edition Release 19.0.0.0.0 - Production
Version 19.3.0.0.0
[21] 如果我们要从其他机器访问 Enterprise Manager,请注意防火墙端口需要放行 [root@node01 ~] # firewall-cmd --add-port=5500/tcp --permanent
success [root@node01 ~] # firewall-cmd --reload
success
[22] Enterprise Manager 的登录界面为 [https://(servers hostname or IP address):5500/em],填写相应的用户名密码就可以登录进去了。 字符界面创建数据库 [1] 登录 oracle 用户,通过dbca命令创建数据库 # set any instance name and create database
[oracle@node01 ~]$ export ORACLE_SID=db01
[oracle@node01 ~]$ export DBEXPRESS_HTTPS_PORT=5500
[oracle@node01 ~]$ dbca -silent -createDatabase \
-databaseConfigType SINGLE \
-templateName General_Purpose.dbc \
-gdbname ${ORACLE_SID}.$(hostname -d) \
-sid ${ORACLE_SID} \
-listeners LISTENER \
-responseFile NO_VALUE \
-characterSet AL32UTF8 \
-sysPassword sysPassword \
-systemPassword systemPassword \
-createAsContainerDatabase true \
-numberOfPDBs 1 \
-pdbName orclpdb \
-pdbAdminPassword pdbAdminPassword \
-databaseType MULTIPURPOSE \
-memoryPercentage 30 \
-storageType FS \
-datafileDestination "${ORACLE_BASE}/oradata/${ORACLE_SID}" \
-emConfiguration DBEXPRESS === 一些警告信息,可以忽略 ====
[WARNING] [DBT-06208] The 'SYS' password entered does not conform to the Oracle recommended standards.
CAUSE:
a. Oracle recommends that the password entered should be at least 8 characters in length, contain at least 1 uppercase character, 1 lower case character and 1 digit [0-9].
b.The password entered is a keyword that Oracle does not recommend to be used as password
ACTION: Specify a strong password. If required refer Oracle documentation for guidelines.
[WARNING] [DBT-06208] The 'SYSTEM' password entered does not conform to the Oracle recommended standards.
CAUSE:
a. Oracle recommends that the password entered should be at least 8 characters in length, contain at least 1 uppercase character, 1 lower case character and 1 digit [0-9].
b.The password entered is a keyword that Oracle does not recommend to be used as password
ACTION: Specify a strong password. If required refer Oracle documentation for guidelines.
[WARNING] [DBT-06208] The 'PDBADMIN' password entered does not conform to the Oracle recommended standards.
CAUSE:
a. Oracle recommends that the password entered should be at least 8 characters in length, contain at least 1 uppercase character, 1 lower case character and 1 digit [0-9].
b.The password entered is a keyword that Oracle does not recommend to be used as password
ACTION: Specify a strong password. If required refer Oracle documentation for guidelines.
=== 一些警告信息,可以忽略 ==== Prepare for db operation
8% complete
Copying database files
31% complete
Creating and starting Oracle instance
32% complete
36% complete
40% complete
43% complete
46% complete
Completing Database Creation
51% complete
54% complete
Creating Pluggable Databases
58% complete
77% complete
Executing Post Configuration Actions
100% complete
Database creation complete. For details check the logfiles at:
/u01/app/oracle/cfgtoollogs/dbca/db01.
Database Information:
Global Database Name:db01.tyun.cn
System Identifier(SID):db01
Look at the log file "/u01/app/oracle/cfgtoollogs/dbca/db01/db01.log" for further details.
上述过程大约需要 15 分钟,具体时长还是要根据机器配置。 [2] 数据库创建完毕,把数据库的 SID 添加到 oracle 用户的环境变量中,并测试数据库的连接 [oracle@node01 ~]$ vi /etc/oratab # last line : change
db01:/usr/oracle/database:Y [oracle@node01 ~]$ vi ~/.bash_profile # add SID to the end
export ORACLE_SID=db01 [oracle@node01 ~]$ source ~/.bash_profile
[oracle@node01 ~]$ sqlplus /nolog SQL*Plus: Release 19.0.0.0.0 - Production on Tue Jun 1 02:01:36 2021
Version 19.3.0.0.0 Copyright (c) 1982, 2019, Oracle. All rights reserved. SQL> connect / as sysdba
Connected.
SQL> select instance_name, host_name, version, startup_time from v $instance; INSTANCE_NAME
----------------
HOST_NAME
----------------------------------------------------------------
VERSION STARTUP_T
----------------- ---------
db01
node01.tyun.cn
19.0.0.0.0 24-APR-22 SQL> exit
Disconnected from Oracle Database 19c Enterprise Edition Release 19.0.0.0.0 - Production
Version 19.3.0.0.0
[3] 如果我们要从其他机器访问 Enterprise Manager,请注意防火墙端口需要放行 [root@node01 ~] # firewall-cmd --add-port=5500/tcp --permanent
success [root@node01 ~] # firewall-cmd --reload
success
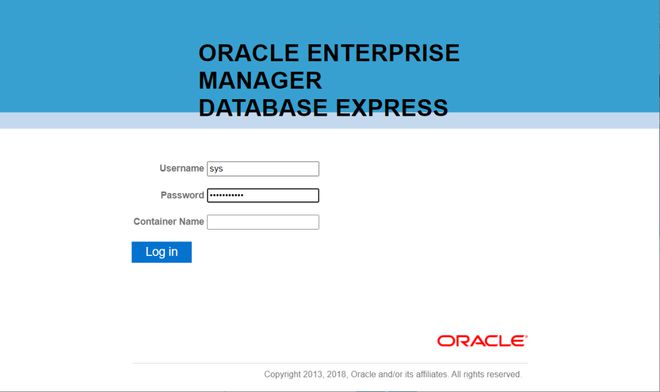
[4] Enterprise Manager 的登录界面为 [https://(servers hostname or IP address):5500/em],填写相应的用户名密码就可以登录进去了。 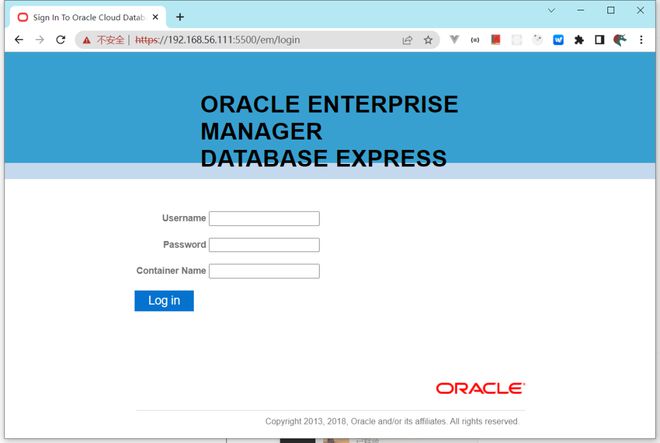
输入密码:sys/sysPassword进行登录:
[5] 下图所示就是 Enterprise Manager 的管理员界面 
创建 Systemd 文件 我们可以为 Oracle 数据库创建 Systemd 文件,让 systemctl 管理其启停的状态。 [1] 使用 root 用户创建 Systemd 文件 [root@node01 ~] # vi /etc/sysconfig/db01.oracledb # create new : define environment variables
ORACLE_BASE=/u01/app/oracle
ORACLE_HOME=/usr/oracle/database
ORACLE_SID=db01 # configure listener service
[root@node01 ~] # vi /usr/lib/systemd/system/db01@lsnrctl.service # this is an example, modify for free
[Unit]
Description=Oracle Net Listener
After=network.target [Service]
Type=forking
EnvironmentFile=/etc/sysconfig/db01.oracledb
ExecStart=/usr/oracle/database/bin/lsnrctl start
ExecStop=/usr/oracle/database/bin/lsnrctl stop
User=oracle [Install]
WantedBy=multi-user.target # configure database service
[root@node01 ~] # vi /usr/lib/systemd/system/db01@oracledb.service # this is an example, modify for free
[Unit]
Description=Oracle Database service
After=network.target lsnrctl.service [Service]
Type=forking
EnvironmentFile=/etc/sysconfig/db01.oracledb
ExecStart=/usr/oracle/database/bin/dbstart $ORACLE_HOME
ExecStop=/usr/oracle/database/bin/dbshut $ORACLE_HOME
User=oracle [Install]
WantedBy=multi-user.target [root@node01 ~] # systemctl daemon-reload
[root@node01 ~] # systemctl enable db01@lsnrctl db01@oracledb
常用命令: [root@node01 ~] # systemctl status db01@lsnrctl.service
● db01@lsnrctl.service - Oracle Net Listener
Loaded: loaded (/usr/lib/systemd/system/db01@lsnrctl.service; enabled; vendor preset: disabled)
Active: active (running) since Mon 2022-04-25 09:15:58 CST; 6s ago
Process: 5565 ExecStop=/usr/oracle/database/bin/lsnrctl stop (code=exited, status=0/SUCCESS)
Process: 5568 ExecStart=/usr/oracle/database/bin/lsnrctl start (code=exited, status=0/SUCCESS)
Main PID: 5570 (tnslsnr)
CGroup: /system.slice/system-db01.slice/db01@lsnrctl.service
└─5570 /usr/oracle/database/bin/tnslsnr LISTENER -inherit Apr 25 09:15:58 node01.tyun.cn lsnrctl[5568]: Log messages written to /u01/app/ora...l
Apr 25 09:15:58 node01.tyun.cn lsnrctl[5568]: Listening on: (DESCRIPTION=(ADDRESS=...)
Apr 25 09:15:58 node01.tyun.cn lsnrctl[5568]: Listening on: (DESCRIPTION=(ADDRESS=...)
Apr 25 09:15:58 node01.tyun.cn lsnrctl[5568]: Connecting to (DESCRIPTION=(ADDRESS=...)
Apr 25 09:15:58 node01.tyun.cn lsnrctl[5568]: STATUS of the LISTENER
Apr 25 09:15:58 node01.tyun.cn lsnrctl[5568]: ------------------------
Apr 25 09:15:58 node01.tyun.cn lsnrctl[5568]: Alias LISTENER
Apr 25 09:15:58 node01.tyun.cn lsnrctl[5568]: Version TNSLSNR fo...n
Apr 25 09:15:58 node01.tyun.cn lsnrctl[5568]: Start Date 25-APR-202...8
Apr 25 09:15:58 node01.tyun.cn systemd[1]: Started Oracle Net Listener.
Hint: Some lines were ellipsized, use -l to show in full. [root@node01 ~] # systemctl status db01@oracledb.service
● db01@oracledb.service - Oracle Database service
Loaded: loaded (/usr/lib/systemd/system/db01@oracledb.service; enabled; vendor preset: disabled)
Active: inactive (dead) [root@node01 ~] # systemctl restart db01@oracledb.service [root@node01 ~] # systemctl status db01@oracledb.service
● db01@oracledb.service - Oracle Database service
Loaded: loaded (/usr/lib/systemd/system/db01@oracledb.service; enabled; vendor preset: disabled)
Active: active (running) since Mon 2022-04-25 09:16:49 CST; 11s ago
Process: 5638 ExecStart=/usr/oracle/database/bin/dbstart $ORACLE_HOME (code=exited, status=0/SUCCESS)
CGroup: /system.slice/system-db01.slice/db01@oracledb.service
├─5753 ora_pmon_db01
├─5755 ora_clmn_db01
├─5757 ora_psp0_db01
├─5760 ora_vktm_db01
......
├─6146 ora_s001_db01
└─6151 ora_w004_db01 Apr 25 09:16:33 node01.tyun.cn systemd[1]: Starting Oracle Database service...
Apr 25 09:16:33 node01.tyun.cn dbstart[5638]: Processing Database instance "db01":...g
Apr 25 09:16:49 node01.tyun.cn systemd[1]: Started Oracle Database service.
Hint: Some lines were ellipsized, use -l to show in full.
从 RPM 包安装数据库
Oracle 官网有编译好的 RPM 包,我们可以通过 RPM 的形式进行数据库的安装,这种方式相对简单些。 [1] 从 Oracle 官网下载 Oracle 19c RPM 包: https://www.oracle.com/database/technologies/oracle-database-software-downloads.html [2] 安装 RPM 包前,还是需要安装依赖 [root@node01 ~] # curl http://public-yum.oracle.com/public-yum-ol7.repo -o /etc/yum.repos.d/public-yum-ol7.repo
[root@node01 ~] # sed -i -e "s/enabled=1/enabled=0/g" /etc/yum.repos.d/public-yum-ol7.repo
[root@node01 ~] # rpm --import http://yum.oracle.com/RPM-GPG-KEY-oracle-ol7
[root@node01 ~] # yum --enablerepo=ol7_latest -y install oracle-database-preinstall-19c
[3] 安装 Oracle Database 19c. [root@node01 ~] # rpm -Uvh oracle-database-ee-19c-1.0-1.x86_64.rpm
Preparing... ################################# [100%]
Updating / installing...
1:oracle-database-ee-19c-1.0-1 ################################# [100%]
[INFO] Executing post installation scripts...
[INFO] Oracle home installed successfully and ready to be configured.
To configure a sample Oracle Database you can execute the following service configuration script as root: /etc/init.d/oracledb_ORCLCDB-19c configure [root@node01 ~] # vi /etc/sysconfig/oracledb_ORCLCDB-19c.conf
# change default settings if you need
# listening port for Listener
LISTENER_PORT=1521 # data location
ORACLE_DATA_LOCATION=/opt/oracle/oradata # EM_EXPRESS_PORT: Oracle EM Express listener
# listening port for Enterprise Manager
EM_EXPRESS_PORT=5500 # create sample Database [ORCLCDB]
[root@node01 ~] # /etc/init.d/oracledb_ORCLCDB-19c configure
Configuring Oracle Database ORCLCDB.
Prepare for db operation
8% complete
Copying database files
31% complete
Creating and starting Oracle instance
32% complete
36% complete
40% complete
43% complete
46% complete
Completing Database Creation
51% complete
54% complete
Creating Pluggable Databases
58% complete
77% complete
Executing Post Configuration Actions
100% complete
Database creation complete. For details check the logfiles at:
/opt/oracle/cfgtoollogs/dbca/ORCLCDB.
Database Information:
Global Database Name:ORCLCDB
System Identifier(SID):ORCLCDB
Look at the log file "/opt/oracle/cfgtoollogs/dbca/ORCLCDB/ORCLCDB.log" for further details. Database configuration completed successfully. The passwords were auto generated, you must change them by connecting to the database using 'sqlplus / as sysdba' as the oracle user.
[4] 为 Oracle 用户创建环境变量 [oracle@node01 ~]$ vi ~/.bash_profile # add to the end
umask 022
export ORACLE_SID=ORCLCDB
export ORACLE_BASE=/opt/oracle/oradata
export ORACLE_HOME=/opt/oracle/product/19c/dbhome_1
export PATH= $PATH: $ORACLE_HOME/bin [oracle@node01 ~]$ source ~/.bash_profile # verify connection
[oracle@node01 ~]$ sqlplus / as sysdba SQL*Plus: Release 19.0.0.0.0 - Production on Wed Jan 21 21:22:53 2020
Version 19.3.0.0.0 Copyright (c) 1982, 2019, Oracle. All rights reserved. Connected to:
Oracle Database 19c Enterprise Edition Release 19.0.0.0.0 - Production
Version 19.3.0.0.0 SQL> select name from v $database; NAME
---------
DB01 SQL> select instance_name,status from v $instance; INSTANCE_NAME STATUS
---------------- ------------
db01 OPEN SQL> exit
Disconnected from Oracle Database 19c Enterprise Edition Release 19.0.0.0.0 - Production
Version 19.3.0.0.0
[5] 创建 Systemd 配置文件 [root@node01 ~] # vi /etc/oratab # last line : change
ORCLCDB:/opt/oracle/product/19c/dbhome_1:Y [root@node01 ~] # vi /etc/sysconfig/ORCLCDB.oracledb # create new : define environment variables
ORACLE_BASE=/opt/oracle/oradata
ORACLE_HOME=/opt/oracle/product/19c/dbhome_1
ORACLE_SID=ORCLCDB # configure listener service
[root@node01 ~] # vi /usr/lib/systemd/system/ORCLCDB@lsnrctl.service # this is an example, modify for free
[Unit]
Description=Oracle Net Listener
After=network.target [Service]
Type=forking
EnvironmentFile=/etc/sysconfig/ORCLCDB.oracledb
ExecStart=/opt/oracle/product/19c/dbhome_1/bin/lsnrctl start
ExecStop=/opt/oracle/product/19c/dbhome_1/bin/lsnrctl stop
User=oracle [Install]
WantedBy=multi-user.target # configure database service
[root@node01 ~] # vi /usr/lib/systemd/system/ORCLCDB@oracledb.service # this is an example, modify for free
[Unit]
Description=Oracle Database service
After=network.target lsnrctl.service [Service]
Type=forking
EnvironmentFile=/etc/sysconfig/ORCLCDB.oracledb
ExecStart=/opt/oracle/product/19c/dbhome_1/bin/dbstart $ORACLE_HOME
ExecStop=/opt/oracle/product/19c/dbhome_1/bin/dbshut $ORACLE_HOME
User=oracle [Install]
WantedBy=multi-user.target [root@node01 ~] # systemctl daemon-reload
[root@node01 ~] # systemctl enable ORCLCDB@lsnrctl ORCLCDB@oracledb
遇到的问题安装失败
我们的虚拟机没有创建 Swap 分区,然后启用了 swap 分区,之后删除 Oracle 安装目录下面的文件,再次进行安装,安装成功。但经过证明,没有 swap 分区也是没问题的。
| 


